
Preliminary PD site for REMIC P6000
The PD (Product Documentation & USER GUIDE) for the REMIC P6000 grand piano microphone, will be available for download soon.
Meanwhile you can read a little on this site, which will be constantly updated, but if you should have any questions regarding this product, don’t hesitate to contact us.

GENERAL
The REMIC P6000 is designed to capture the very first movements of air molecules, set in motion by the soundboard of the instrument. This way you will gain the most accurate transient response along with an astonishing representation of a rich tonal balance between fundamentals and overtones.
The REMIC P6000 consists of two matched pair, high definition condenser cartridges, carefully arranged inside two acoustic lenses, ensuring no phase issues occurs within the audible range.
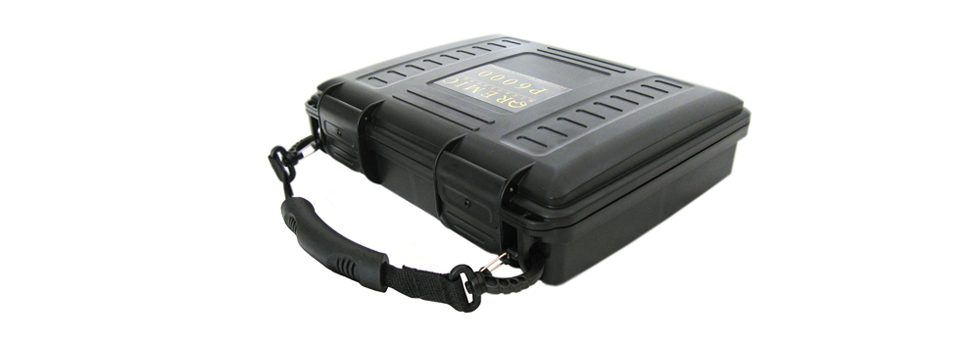
The 444 gram of resonance free brass composite material housing, ensures that no LF pitch distortion occurs.
The REMIC P6000 has been designed to be “Acoustically invisible” to the acoustic characteristics of the instrument and does not change the overall timbre.
PLACEMENT
The REMIC P6000 is placed on top of the soundboard beneath the strings, pointing towards the the hammers (aming E4/F4) and can be moved around on the soundboard to achieve the desired tone (timbre).
Since no two instrument are exactly alike, it means that you may have to find the right locating for placing the mic, in order to achieve the desired timbre depending upon instrument and type of music genre.
Examples of placements
(recommendations from artists and sound engineers)
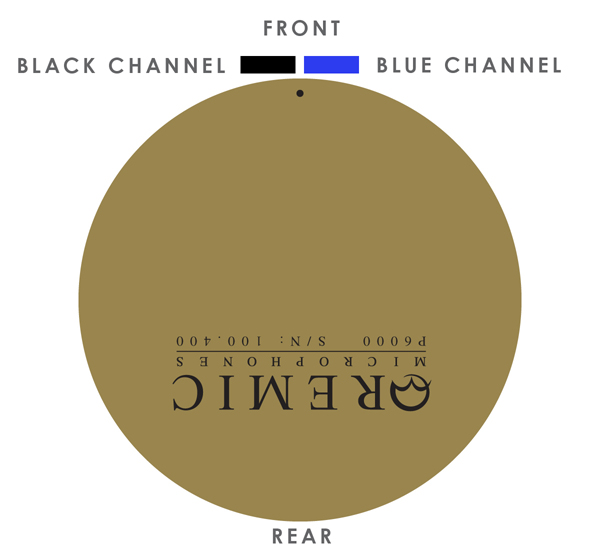
For an easy setup, it’s recommended that the REMIC P6000 is placed directly on the soundboard within the colored zone illustrated in the figure below.
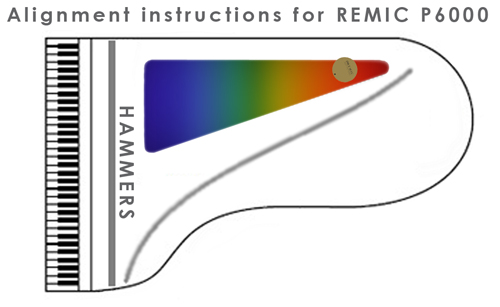
Point the “Front centre marking”, (the small dot), on the REMIC P6000towards the hammers, representing E4/F4.
Placing the REMIC P6000 within the “red” zone, means that you will get more “bass” (good for some grand pianos with less low-end) and less attack.
Placing the REMIC P6000 within the “blue” zone , near the hammers, will give a “harder” and more distinctive attack.
In any case, this guidance are only recommendations, since no two grand pianos are alike. Also the individual playing technique of artists and the music genre has an influence on the outcome.
User feedback
Please contact us if you come with any further experiences on where to place the REMIC P6000 on a grand piano. If the experiences are well documented we will post the recommendations on this site in order for others to benefit from your experiences.
Thanks!
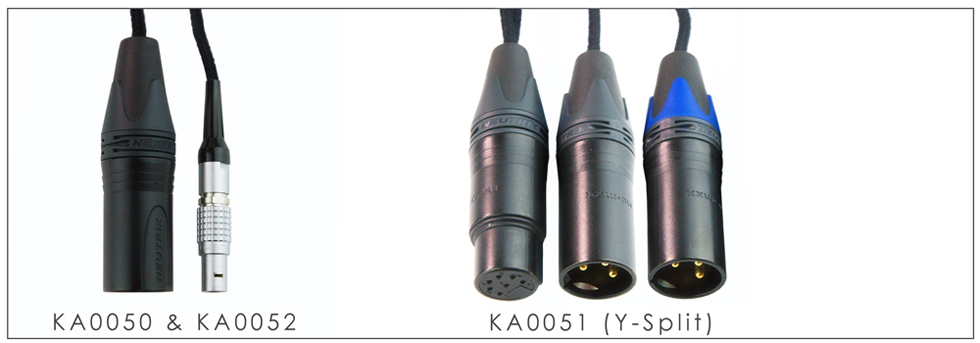
ELECTRIC CONNECTION & SIGNAL ALIGNMENTP6000 signal cables
_____KA0050
_____Straight cable, 5 pole LEMO to 7 Pole Neutrik, length 2 meter [ standard and included in package ]
_____KA0051
_____Y-Split cable, 7 Pole Neutrik to 2 X 3 Pole Neutrik (Black and Blue markings) [ standard and included in package ]
_____KA0052
_____Straight cable, 5 pole LEMO to 7 Pole Neutrik, length 3 meter [ on orders only ]
P6000 signal alignment
CHANNEL SEPARATION
The REMIC P6000 is designed to obtain a natural channel separation of the two signals, in a way that it will not generate a “stereo over bias”.
Meaning that a maximal channel separation can be used and still maintain a natural stereo field (this of course depends of the alignment of the PA speakers also).
FREQUENCY SPLIT
At some live productions, it can beneficial to separate the signal rails from the two microphones, using a frequency division or frequency split.
The signal rail (Channel) representing the lower tone register, is filtered using a LOW-PASS, between 80 and 200 Hz.
The other signal rail (channel) is filtered using a HI-PASS, with identical cross pass.
The exact frequency split (crosspoint) depends on the instrument and the acoustic environment.
Then use the PAN control on each signal rail (on the mixing console), to define the final stereo perspective.
This way you will gain more control over the two signal rails, in order to enhance the overall headroom (gain before feedback).
In some cases it can be necessary to use a third microphone placed underneath the grand. This mic could be a dynamic mic. In this case use a HI-PASS for both P6000 channels and a LOW-PASS for the third mic.
As “Phase correction” between the two microphone signals, use the delay on one of the signal rails (mixing channels) to define the absolute attackpoint on each signal rail, meaning that all signals from an attack, should occur at the exact same time.
LIVE RECORDING
(HALL & CHURCH RECORDING)
For recordings where the acoustic environment is an important part of the final tonale perspective, e.g recordings obtained in a concert hall or church, it is very important to capture more signal information than the REMIC P6000 microphone can gather.Since the REMIC P6000 will capture the primary sound of the instrument, with all its overtones and attacks and not too much of the room/hall ambience, it is therefore necessary to capture the sound of the room, by using two or more large diagram microphones and afterwards mix all the signals captured.
This way you will obtain the most accurate attack and overtone response of the instrument in the most astonishing blend with the tonal richness of the room.
More to come!